导出示例
参考:https://alibaba-easyexcel.github.io/quickstart/write.html
# 新建demo-easy-excel项目
New -> Project
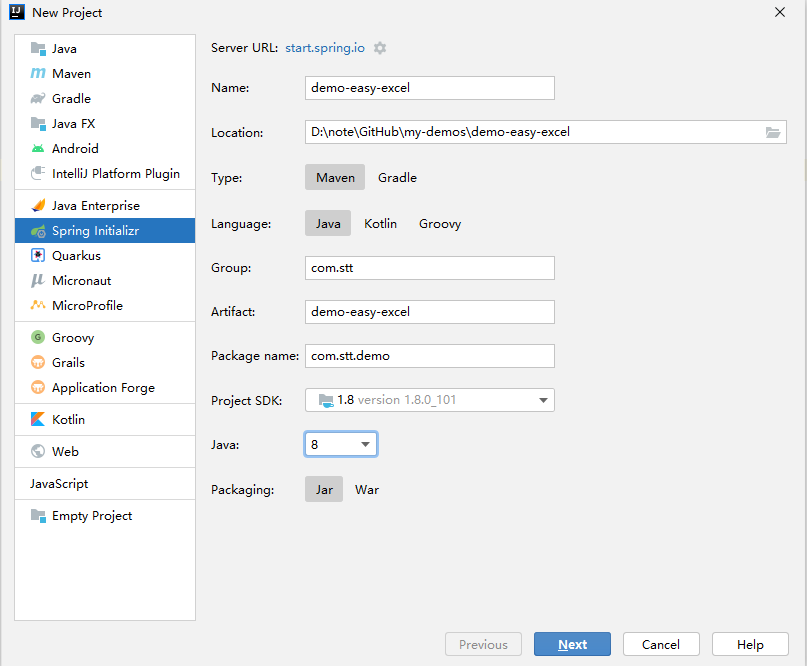
点击Next ,然后点击Finish创建
# 添加依赖 pom
<!-- https://mvnrepository.com/artifact/com.alibaba/easyexcel -->
<dependency>
    <groupId>com.alibaba</groupId>
    <artifactId>easyexcel</artifactId>
    <version>2.1.1</version>
</dependency>
1
2
3
4
5
6
2
3
4
5
6
# 写操作
创建bean对象,通过注解进行excel列定义
package com.stt.demo;

import com.alibaba.excel.annotation.ExcelProperty;

public class Student {

    public Student(Integer no, String name) {
        this.no = no;
        this.name = name;
    }

    // 设置excel列名称
    @ExcelProperty("学生编号")
    private Integer no;

    @ExcelProperty("学生姓名")
    private String name;

    public Integer getNo() {
        return no;
    }

    public void setNo(Integer no) {
        this.no = no;
    }

    public void setName(String name) {
        this.name = name;
    }

    public String getName() {
        return name;
    }
}
1
2
3
4
5
6
7
8
9
10
11
12
13
14
15
16
17
18
19
20
21
22
23
24
25
26
27
28
29
30
31
32
33
34
2
3
4
5
6
7
8
9
10
11
12
13
14
15
16
17
18
19
20
21
22
23
24
25
26
27
28
29
30
31
32
33
34
进行写操作
package com.stt.demo;

import com.alibaba.excel.EasyExcel;

import java.util.ArrayList;
import java.util.List;

public class StudentExcelWrite {
    public static void main(String[] args) {

        // 准备数据
        List<Student> studentList = new ArrayList<>();
        for (int i = 0; i < 10; i++) {
            studentList.add(new Student(i, "stt_" + i));
        }

        // 设置输出路径
        String fileName = "d:/student.xlsx";
        // 实现写操作
        EasyExcel.write(fileName, Student.class)
                .sheet("学生信息")
                .doWrite(studentList);
    }
}
1
2
3
4
5
6
7
8
9
10
11
12
13
14
15
16
17
18
19
20
21
22
23
24
2
3
4
5
6
7
8
9
10
11
12
13
14
15
16
17
18
19
20
21
22
23
24
Last Updated: 2022/01/16, 11:29:51